SURYA NAMASKAR – THE MOST SCIENTIFIC APPROACH WITH BENEFITS

- Aditya Tripathi
- Dec 20, 2022
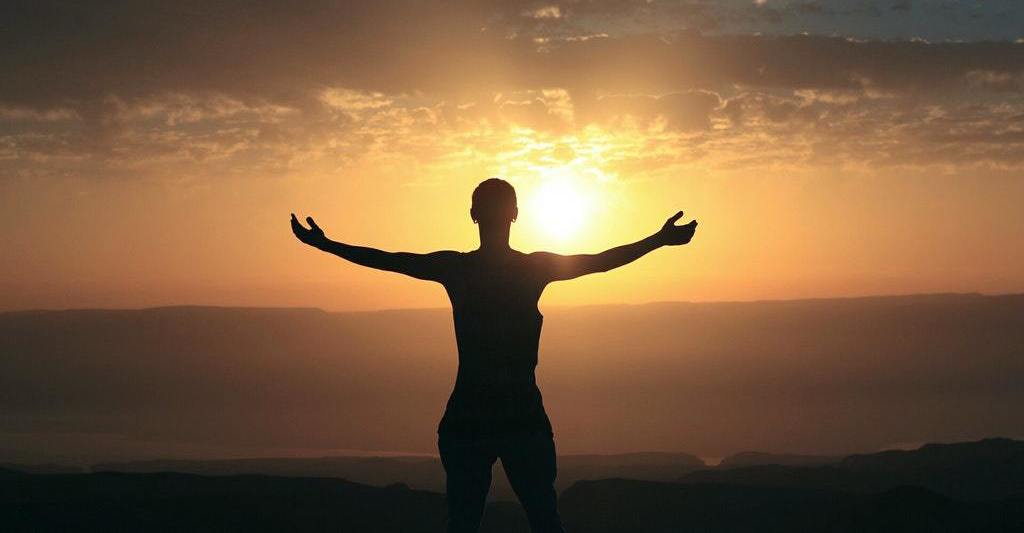

Surya Namaskar, also known as Sun Salutation in various areas, is a complete and perfect Yoga workout for human body. It consists of major important Yogasans and Pranayams that can improve and Enlighten your daily life making you Attractive like a Sun.
Practising Surya Namaskar daily improves your Physical and Mental fitness and nourishes your body with Pure air and Energy of Sun. It has been proven that practising Surya Namaskar have immense positive effects on Body, Mind and Soul. In Indian Tradition it is also taken as Expressing Gratitude towards the Sun – The Natural God.
Ideally there is no Prescribed time to practice this set of Yogasanas. It would be Great to do it in Morning but have equal effects if performed in evening.
Read More – Surya Namaskar History
Also Read – How to Start Yoga – Beginner’s Approach
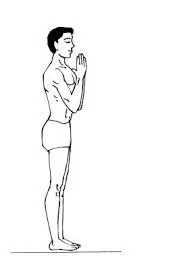
Stand straight on the mat. Keeping your Body Relaxed, distribute your body weight on both the Feets equally, hands relaxing on the sideways. Now lift your arms up from the sides during as you Breath in and make the Namaskar Mudra (join your Palms) as you breath out.
From the Pranamasana, lift the arms up, stretch them slightly to the back. Do this while breathing in. make sure your Biceps would remain close to the ears. Bend slightly backward from the Spine and try to Reach up with your Finger by adjusting your Pelvis.
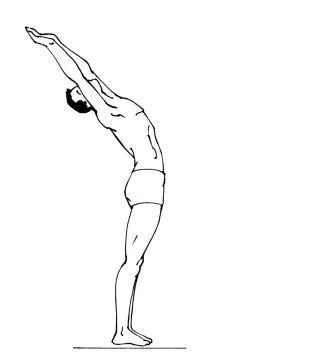
PS – Make sure to tilt backwards from the Spine only not by folding Knees. Do not bend your knees.
While Exhaling, bend forward and touch the floor with your palms and place them besides your feet. Make sure to bend from the Waist, keeping the spine Erect. Try to touch the Knees with your head.
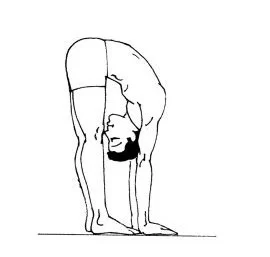
PS – If you feel pain and have problem in placing the hands on ground, then bend the knees slightly and then try to straighten the knees slowly.
While breathing in, Push your Left Leg backwards as far as you can and touch the knee to the Floor keeping the toes erect. Place your right Leg in between Arms and making the 90 Degree with the floor. Stay for a minute then Breath out.
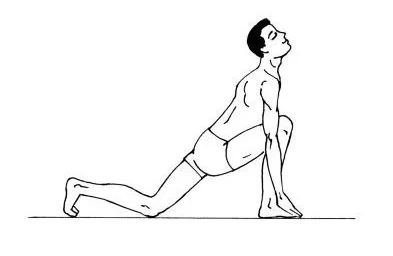
PS – Look upwards and Keep the Arms Straight. Lower down the Waist to increase the Stretch.
While Breathing in, take the Right Leg Backward and make the Pushup Position. Make your Neck Straight making the spine and whole body in a Straight Line. Keep your Arms Straight making 90 Degree with the Floor.

PS – Do not Look downward or Upward
While Breathing out, bring your Knees to touch the Floor. Take back your Hip slightly, bend your hands and rest your Chest and Chin on the Floor. Thus overall 8 parts of Body are touching the Floor – 2 Knees, 2 Palms, 2 Feet, Chest and Chin.

PS – Keep your hands close to your shoulders and Put your Hip slightly Upwards
While Breathing in, Slide forward and Raise your chest and try to look up towards the sky. Stretch your Feet backward and try to stretch your body as much as you can. You have to make Cobra Pose bending your Spine little backwards.
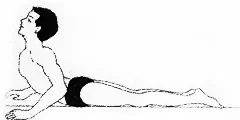
PS – Do not stretch your body forcefully
While Breathing out, bend the neck downward and push your Hips and Waist upwards. Place your Palm and Heels flat on the Floor to make an Inverted V Pose. Keep your Legs Straight.

PS – Do not Bend the arms
While Breathing in, Bring your right Leg in between your Palm and make the position like in Step 4. Make sure your Left leg remain Straight and Right Leg in between the arms making 90 degree with the Floor.
.webp)
PS – Bend your knees slightly if you feel uncomfortable
While Breathing in, Lift your Body up, and bend backwards slightly as in Step 2. Try to stretch your hands up. While Lifting up, make sure your spine would remain Erect

PS – Do not Bend your knees.
While Breathing out, Make your Body comfortable and Straight, resting your hands Sideways.

Doing these 12 Steps will make Half round. Repeat it with Right Leg going Backward in Step 4.
Surya Namaskar has uncountable Health Benefits. It enhances both Physical and Mental Fitness.
Practising Surya Namaskar regularly increases your Immune System and make you Look younger. There are various versions of Surya Namaskar practised all over the World. Have you Practised this Perfect Yoga workout before? What are your Experiences ?
Sign up for free and be the first to get notified about new posts.
